Wednesday, October 26, 2011

my father's T-square (cutting more cement board for tiles)issued twice..

marking the durock for the first cut (with my father's T-square)
This is a lot of visual reference for a fairly simple procedure, but since the earlier post about cutting cement board (durock, and other trade names) has had a number of views, I'm repeating the process, here.  I also wanted to say a few things about my father's tools.  Before he died, one month shy of 94, he had passed on to me his tools--he was a heating and cooling engineer, and also made beautiful wooden furniture and smaller wall pieces (out of orange crate).  He had memory loss which began to affect his everyday work for about 10 years before he died; still, he was able to physically do a lot of different things, and was the main person helping me paint the old tables that I was tiling and taking to fairs to sell.  Here, I'm using his T-square to cut up a thin sheet of handyboard or durock (a cement board with fiberglass thread reinforcement).  I want to cut a circle, so I begin by cutting out a square, and then cutting off the 4 corners, and then nipping the extra with the old pair of pliers he gave to me.  I think the yellow cutting knife was his, too.  The cuts are made by scoring the surface of the board with the blade of the knife (fresh blades are good!)--pressing the blade against the metal ruler edge while dragging it across the surface of the board. Then I break open the cut by laying the cut along the edge of the table and whacking down on the part which hangs over the edge.  It won't be cut all the way through, so you need to score the back side, as well-----along the inside of the now folded line.  Once the cuts have made the circle round enough, able to fit into the chair circle, the circle of durock can then be glued down/or in to the chair form with some Liquid Nails.  It's also held there by bolts that come in from the outside of the round metal form.  I will post the final 'look' of the tiled chair on the next post. 
Breaking the board open after scoring the top side

marking for the second cut

cutting away the edges of the circle

nipping off the curved area between the straight cuts

fitting the circle into the chair base


Behind My Studio

the corn is being cut; fall is here!
Rickye's garlic

Peter's ginko trees
....there is a changing area which evolves, year by year, depending on what I have to throw into the ground, and how energetic I feel about weeding it.  It's not the organized plan that our son, Pete, did in the 90's, just north of the sheds, laid out with brick paths and planted with all sorts of cultivars of kale, tomatoes, mesclun, beans, peas, mustard greens, grapes, ( a handful, compared to all that was planted), and whose compost pile has inspired the yunomi pots for the Akar Gallery (see the link:  http://anntubbsmaiolicapottery.blogspot.com/2009/12/getting-ready-to-decorate.html).  This garden, behind my studio, no one sees but me, and the occasional farmer plowing or taking in the corn (and I doubt that they're paying much attention to this little area, while driving).  I planted a wild cherry to the west side, so there is shade, and a sage 'bush' grows underneath it, and some rescued roadside sunflower-type plants struggle, and straggle along the wall, under the window.  On the other side is a viburnum bush, whose berries have inspired decorations, and a tomato patch, with some cilantro that will winter over if I put a semi-clear plastic box over it.  In the spring (this year?  last?  two years ago?)  I planted all the unnamed, leftover seeds that had been residing in a box out in the laundry room. I'd hated to simply throw them out; they were from Peter's plantings!  So I began planting them in the area behind the studio--a sort of 'setting out' garden.  Then, this fall, while clearing the area out so I could plant the wonderful garlic given to me by a friend and customer, Rickye Heffner, I uncovered four or five baby ginko 'seedlings'!  Who knew? (and now, I believe these ginkos were actually from the memorial service for Dr. Robert Brundage, a wise and gentle man from Toledo,OH,  who died several years ago--and on the memorial program was a ginko seed--I collected Bruce's, Pete's, mine, and probably several others--Here's to you, Robert!

Sunday, October 2, 2011

Some of the process of making an icon

the first feathering of ochre

applying the gold leaf
 Here are some of the earlier stages of the icon.  We worked on a small surface made from ginko wood which was covered with a sheet of muslin soaked in rabbits' skin glue.  After the glue had dried, a gesso, made from the glue and calcium carbonate, was applied, building up the surface til a polished painting surface was achieved.  The first drawing was with a brush dipped into the yellow ochre (no egg, yet) and feathered on.  After the area for the gold was determined, and the adherant for the gold applied, the feather-light sheets of gold were floated over the area and then pressed down.  In the final photograph (which I wasn't able to turn--it was Juliana's photo, and, though I could turn the others, I failed with this one)--you can see the small shot glasses of colored powder, and a mix, in the mortar, of the egg yolk and the powdered color.  A 'Wallace and Gromit-like' cow keeps watch of my progress.  After this, a thin application of ox gall was applied to the areas of the gold that were to be painted over (edges of the ears, for example).  Finally, I was ready to begin the mixing of colors, and the painting of layers.
gold leaf applied; colors ready to be mixed

Friday, September 23, 2011

my Icon class--St. Max

I've been taking an icon class with Carol Lehmann, taught by Juliana Clendenin, out in Metamora (Juliana studied under Philip Davydov, in Jordanville, NY this summer.)  We worked with ground earth colors (not unlike those I work with in maiolica) and mixed them with egg yolk for an egg tempera.  I decided to do Max, the studio kitty, making my icon slightly irreverent.  Here are some of the stages of the process.  It's very time-consuming!  I worked with small brushes, and layered on various 'glazes' made with the egg yolk and the ground earth colors.The gold aura was put on very early in the design process/layering, and will brighten once the whole piece is lacquered (which can't be done until the piece has dried). More of the stages of painting will follow in the next post.

Wednesday, September 21, 2011

Cleaning out the pug mill

cleaning out the pug mill
The summer was hot, and I seemed to be busier than usual---firing kilns and decorating bisque, and firing more kilns---so I wasn't recycling the clay scraps from throwing and handbuilding, as I would do at other times of the year.  The combination of the hot and dry weather, and my work schedule, meant that the clay that was still in the pug mill from the last pugging dried up!  In order to use the mill this fall, Sheri and I had to take it apart, and clean out all of the dried and semi-dried clay, making sure that all the little dried bits were remixed, before we could pug another batch of clay.  
The pug mill has saved me a lot of wedging hours.  It mixes up all the stiff, but still pliable leather hard clay pieces left over from handbuilding with the softer clay scraps from throwing--producing a smooth extrusion of clay that is about 3" in diameter.  You can see the auger (just below the metal housing which Sheri is cleaning out) which mixes the various types of clay.  When I bought the mill, I installed a vacuum pump, and this does a pretty good job of taking out the air bubbles that might get mixed in.

Friday, September 2, 2011

setting the tiles

small unglazed strips used for spacing
vinyl mastic on the top of the coffee table


tiles are set into the mastic
each tile is numbered

Pat checks the spacing for each tile


After all of the tiles were fired, my friend, Pat Ligibel, came over to help me set them onto the table top (see the previous post).  We used a vinyl mastic that's appropriate for tiles in this setting.  First, we laid out the exact number of tiles, and checked that the spacing was adequate.  Pat suggested that I had the tiles too close together, so we eliminated the thin outer edge spacers, and rearranged the tiles, again.  Then we carefully removed the tiles, placing them in order onto the canvas work top.  The plywood coffee table top was then elevated onto the work table, and covered with a thin coat of the vinyl mastic.  Then we started with the outer edge (bull nosed) tiles, buttering the back, unglazed area of each tile and pressing it into the mastic on the table top.  After the edge tiles, the center 4 by 4's were buttered and adhered (each tile had been numbered after the bisque, and before the waxing of the tile proceeding the glazing). Filler strips and little tiny squares were added last.  Now the top has been drying for several days. When it's completely set up, I'' put the top onto the base and we will grout it----

Wednesday, August 31, 2011

another table!

the tiles for the table, laying out on the actual surface
 I'm putting together another table--this one is an order from a good customer who already has had me redo another round table, similar in decoration to this one, and has asked for a re-working of one of her coffee tables.  I took off the existing top, and had a baltic birch piece of 4/3" plywood cut for me, at Toledo Plywood.  Then I painted it, top and bottom, with a latex black.  I'll mastic the tiles onto the table with a vinyl product.
The tiles are cut with a 4" by 4" tile cutter (see previous blog entry:) and dried, flat, between sheets of gypsum board.  They are laid out, after bisquing and glazing, in the form of the table, and then decorated.  Edge tiles were extruded, and cut with the same tile cutter.  I need to decorate and fire more of the little strips before I can glue the tiles down (b.)
(b.) black areas are the underlying board; I'll need to make more of the strips

(d.) extra leaves

(c.) leaves, instead of a tile, for interest

(f.) little spacer tiles and unglazed strips

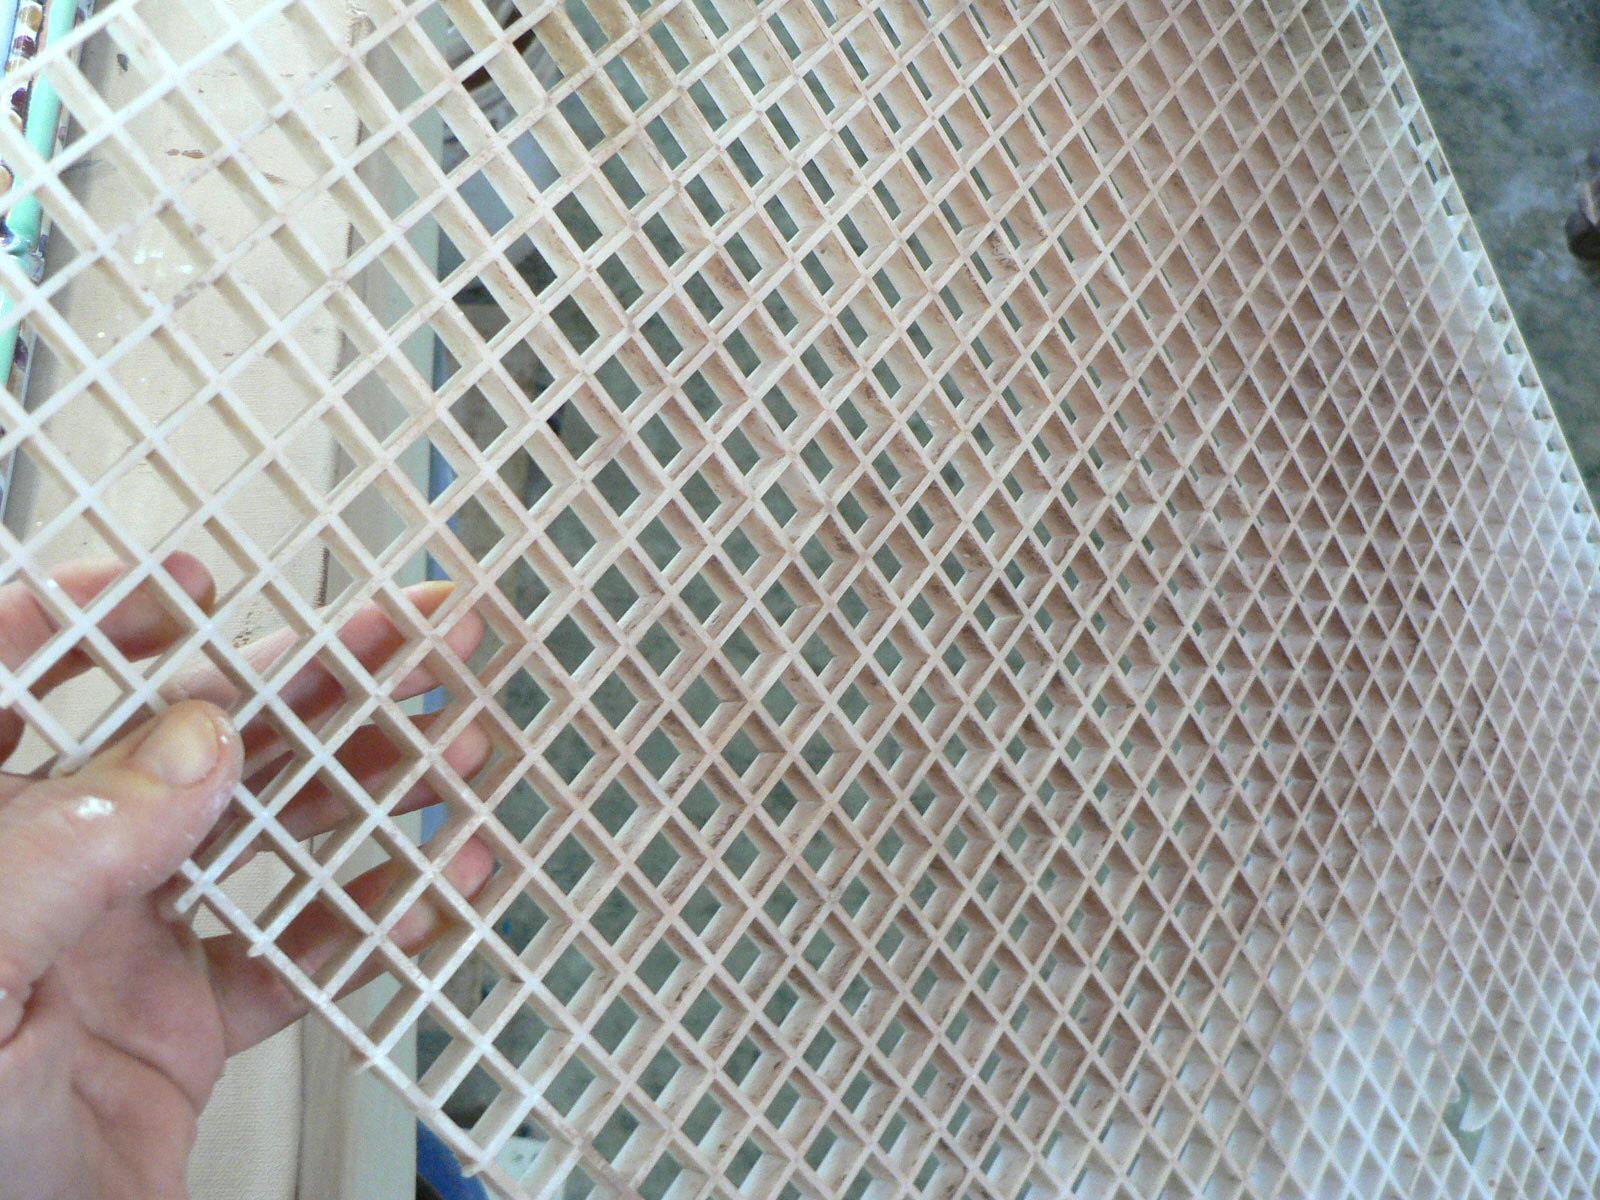
(e.) egg crate, from fluorescent lights: the template for the little square tiles
Here and there, to break up some of the 4-squaredness, I try out the insertion of some of the leaves(c.) which I make and save for tile projects (d.)  I also press clay into 'egg crate--the plastic 'screen' (e.) which covers a fluorescent fixture.  As the clay dries, the little squares drop out.  I bisque them all together in a bowl, and then wax and dip each one into the glaze.  Then, with tiny brushes, I decorate the top.  It reminds me of tiny petit-four cakes. (f.) The unglazed strips are the cut-offs from the 6 by 6" tiles,which are too big to fit into a commercially made wooden frame.  I have to cut 1/4" strips off of each side.  If I can keep these strips straight, then I can use them for fill-in strips when a glazed thin tile would be too wide.

Wednesday, July 27, 2011

finishing the hexagonal table

rubbing in the grout with the heel of my hand

wiping away the excess grout
 I'm finally finishing the hexagonal table.  This morning (it's not so hot, now) I took the table outside--I knew I was going to make a mess getting grout into the edge tiles, and I wanted to be sure I could get the table through the door.....
--and I mixed up the grout with the acrylic admix, then spread it across the table, pushing the grout into the interstices between the tiles with the heel of my hand.  I wouldn't normally do this outside, since the grout would dry too fast, so I had to work quickly.  After the entire table was 'grouted', I dampened an old sponge and began to wipe off the excess grout.  It took several passes, squeezing the sponge out as much as possible each time.  I didn't want to flood the table with water.  After most of the grout was wiped off with the sponge, I then used an old rag to wipe and polish the surface.  Finally, when the grout had dried enough not to be wiped out, I scrubbed the surface of the tiles with a green scrubbie.  After the grout has completely dried, I'll seal it with a grout sealant. The sealant is brushed onto the grout, and after a few minutes, is wiped off of the tiles. 
scrubbing off the film of grout, then sealing the grout

Wednesday, July 13, 2011

It's not Oklahoma, but........


the edge tiles

corner edge tile for the hexagonal table

numbering system for table tiles

hexagonal table
I'm firing a glaze kiln, and decided to take the thermometer out to the studio  (never a good idea; I'll get too depressed) to see just how hot it really was.  It was hot!!! about 110F.   Though a little cooler if you lay down on the floor.  -heat rises, you know.....Whew!  And that's why I don't keep a thermometer out in the studio anymore.  During the winter, it's toasty, but now, in the middle of a heat wave, it's just plain hot!  Still, I have to do some work out there. I threw 3 bowls, made 2 large and 3 small slab platters, a 4-legged bowl, a casserole, and threw 2 bottoms for more large pitchers.  This weekend I go off to another fair, and I want work to dry enough so that I can do a bisque as soon as I get back.  There's a lot of raw ware waiting on the shelves, but I thought I could turn out a few more pieces.  I am also setting up tiles for a hexagonal table---each tile is numbered before it's waxed and glazed, and extra little edge pieces are done generically, then fitted in after the firing.

Wednesday, July 6, 2011

it's summer!

the farm road across from my studio where I ride my bike

the farm, this year (with the roof/walls painted on the barn)
A year ago I did some sketches of the farm road across from my studio, where I walk and ride my bike, and, in winter, cross-country ski.  It's not 'exciting', but it's safe (very little traffic....) and it gives me time to ruminate when I'm working out a problem in the studio.  Here, for the farm tiles, I used 6" by 6" tiles, and mounted them in a frame which I'd backed with a piece of luan plywood.  The outer design of the image is a variation on the pattern that is on the floor tiles in the home where my nephew lives, in Lerici, Italy. The corn, which is growing on either side of the lane, is now high enough that I can't see out! 

Monday, June 20, 2011

final touches


finishing the throwing of the top section

And, now, the final throwing---I throw the top section in and up to the height I want it to be (in relation to the bottom section), and then:

leaving a thicker rim (a)

pulling out the pouring spout (b)

refining the pouring spout (c)

pitchers finished, with handles, now drying (d)
While the top rim is freshly thrown (a), I gently and slowly pinch out the pouring spout, thinning it and curving it outward (b and c). Then I wrap the pot in plastic wrap (dry cleaner's bags) to retard the drying and to equalize the moisture content of the pot.  The handle is the last to be added, and I do this as soon as the rim is strong enough to support my pulling of the handle from its edge.

Saturday, June 18, 2011

finishing the pitcher

centering (a)

throwing down (b)
collaring in (c)


throwing up (d)

 --continuing from the previous blog post:  once the collar/ring is centered (a), and well joined to the base form, I can begin to throw it into an integrated pitcher form.  First I throw the clay down to further join the top ring with the bottom form (b). Then I choke it inward (c), and lift it up (d), (e), leaving a thicker rim at the tip which will be used to pull out the pouring lip. After that, if there is any unevenness to the top edge, I cut it off with a needle tool while the wheel is still turning (f). 
cutting off the uneven top (f)

Wednesday, June 8, 2011

throwing two-part pitchers--stage one

throwing the ring (a)
scoring the top edge of the lower section (c)
scoring the top edge of the lower section (b)


upending the ring onto the lower section (d)

the two parts, together....(e)
joining the top clay to the bottom (f)

I'll try to do this in two posts (though I probably should have done a video)-----When I throw an especially tall form I have various ways of making it easier:  here I'll talk about tall pitchers.  First, I throw the bottom section and take it off the wheel, on its bat, to dry to a soft-ish leatherhard.  Later, when the bottom has stiffened slightly, I measure its opening, and throw an open ring (a) that will fit onto the top edge of the bottom half.  This ring is also taken off the wheel, while still on its bat.  Since I've left the bottom half on the bat, not yet cut off,  I don't have to re-center it.  I now put it back onto the wheel.   Then I take the thrown collar/ring and flip it upside down (d) and onto the moistened (b & c) top edge of the lower piece (centering it). After that, I cut the bat away from the ring (using fishing wire) and then smooth (f) some of the clay in the top ring downward, onto the bottom form---I do this both inside and out.  Now I have a taller piece:  the lower half is stiff enough, though thin, to support the upper half, and the upper half is soft enough to be thrown, still, without distorting the lower half (which I'll show in the next post).